
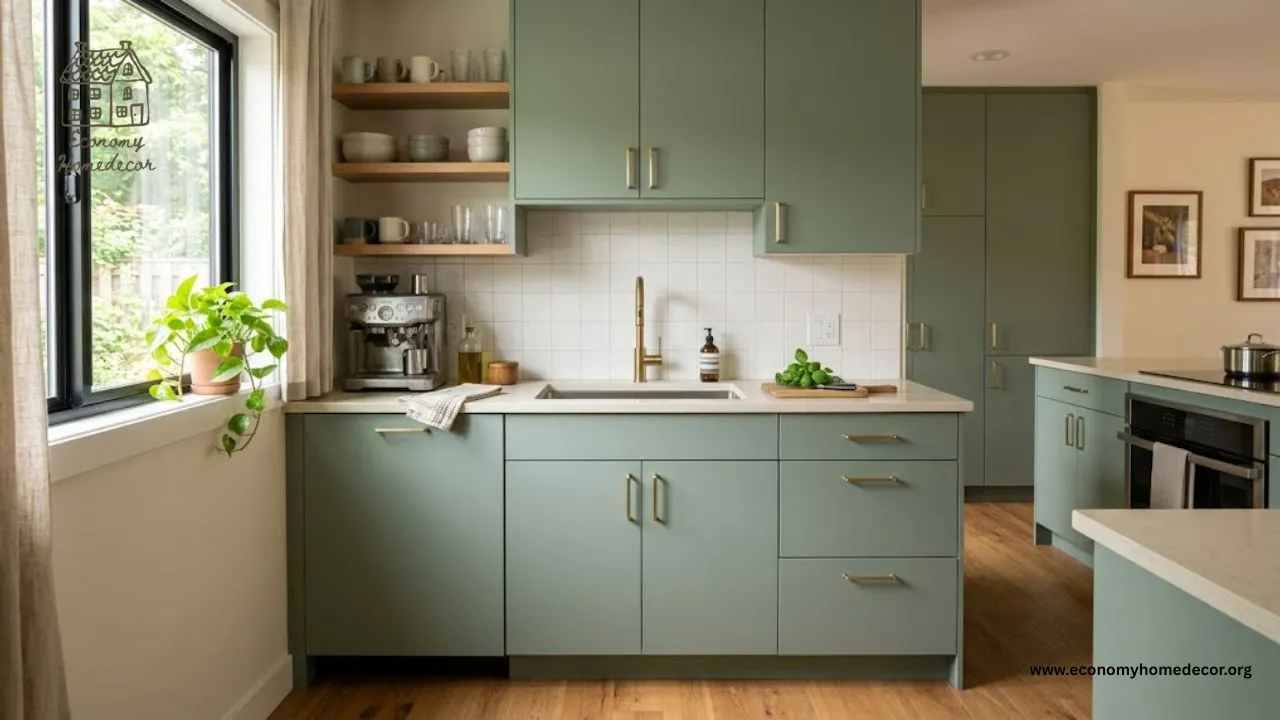
Replacing kitchen cabinets can be expensive, messy, and disruptive. Painting them requires careful preparation and may not be allowed in a rented home. If you want a faster and more affordable update, using contact paper for cabinets can completely change their appearance without a major renovation.
Modern contact paper also sold as peel-and-stick vinyl or self-adhesive furniture film is available in convincing wood, marble, stone, matte, and solid-color finishes. It can cover outdated cabinet doors, conceal minor cosmetic imperfections, line shelves, and help renters personalize a kitchen without making permanent structural changes.
However, contact paper is not suitable for every cabinet or every household. The quality of the result depends heavily on the existing surface, the product selected, and the care taken during installation.
This guide explains how to choose, measure, install, maintain, and safely remove contact paper from cabinets while avoiding the mistakes that often make DIY cabinet makeovers look unfinished.
Is contact paper suitable for kitchen cabinets?
Contact paper works best on cabinet surfaces that are:
- Smooth and solid
- Clean and completely dry
- Free from grease, dust, and cleaning residue
- Properly sealed or finished
- Relatively flat
- Not exposed to excessive heat or standing water
Laminate, melamine, sealed wood, metal, and smooth painted cabinets may accept adhesive film well. Compatibility still depends on the particular adhesive and the condition of the finish, so testing the product in an inconspicuous location is essential. Contact paper is less successful on:
- Raw or highly porous wood
- Deeply textured cabinet doors
- Peeling paint or veneer
- Crumbling particleboard
- Greasy or damaged surfaces
- Doors with extensive molding
- Areas exposed to direct heat
- Cabinets with persistent moisture problems
Self-adhesive film does not repair structural damage. If a cabinet door is swollen, warped, cracked, or separating at the edges, fix or replace the damaged material before attempting a cosmetic covering.
Benefits of using contact paper on cabinets
It costs less than cabinet replacement
Contact paper for cabinet can produce a noticeable visual change without purchasing new doors, hardware, and cabinet boxes. This makes it attractive for temporary updates and budget-conscious projects.
Remember to calculate the entire cost, including extra material, application tools, cleaning supplies, replacement blades, and possibly new handles.
It does not require specialist painting skills
A contact-paper makeover avoids sanding, priming, and multiple coats of paint in many situations. Installation still requires patience, accurate measuring, and careful cutting, but there is no drying time between coats.
Many designs are available
Popular choices include:
- Matte white
- Warm beige
- Black and charcoal
- Light oak
- Walnut
- Natural stone
- Marble
- Concrete
- Brushed metal
- Soft green or navy
The best patterns have restrained colors, realistic scale, and a low-gloss surface. Extremely shiny marble and heavily repeated wood patterns are more likely to reveal that the surface is vinyl.
It can be removable
Some products are marketed as removable or renter-friendly. That does not guarantee damage-free removal from every cabinet. Adhesive may bond differently to old paint, weak finishes, paper-faced materials, veneer, or cabinets exposed to heat. Always test the product first, particularly in a rented property.
It is easy to clean
Many cabinet films can be wiped with a soft cloth and mild soapy water. Follow the manufacturer’s cleaning instructions because abrasive pads, strong solvents, and alcohol-based products may damage or discolor certain printed films.
Disadvantages to consider before starting
Contact paper is a cosmetic finish rather than a permanent replacement for damaged cabinetry. Its limitations include:
- Edges can lift if they are poorly prepared.
- Seams may remain visible.
- Sharp tools can scratch or puncture the surface.
- Heat may soften or distort some films.
- Water can work beneath unsealed edges.
- Detailed doors are difficult to cover neatly.
- Adhesive may affect a weak underlying finish.
- Lower-quality patterns may look artificial.
- Removal can leave adhesive residue.
- A full kitchen requires considerable time and patience.
Contact paper is most convincing when used on simple, flat cabinet fronts. If you have highly detailed raised-panel doors, professional painting, refacing, or replacement doors may provide a cleaner result.
Contact paper, vinyl wrap, or shelf liner: what is the difference?
The terms are often used interchangeably, but products can be designed for different jobs.
Decorative contact paper
This is a self-adhesive covering generally used for shelves, drawers, furniture, walls, and small household projects. Quality and thickness vary considerably.
Furniture film
Furniture film is made specifically for covering furniture and cabinetry. It may be thicker, more conformable, and available in more realistic finishes than inexpensive shelf paper.
Cabinet vinyl wrap
Architectural or cabinet-wrapping vinyl is generally intended for larger surfaces and may offer better durability. Professional products sometimes require particular tools, primers, or installation experience.
Nonadhesive shelf liner
Nonadhesive liner is designed to sit inside drawers and cabinets. It is useful for shelf protection but will not wrap securely around cabinet doors. Before purchasing, confirm that the product is recommended for furniture or cabinet surfaces. Do not choose a design based on appearance alone.
How to choose the best contact paper for cabinets
Check whether it is appropriate for kitchens
Read the product specifications for information about:
- Intended surfaces
- Heat limitations
- Moisture resistance
- Cleaning requirements
- Indoor use
- Removability
- Recommended application temperature
- Required surface preparation
Do not interpret “water-resistant” as “waterproof.” Even a moisture-resistant surface may fail if water enters through seams, punctures, or exposed edges.
Choose the right thickness
Thin contact paper is inexpensive and flexible, but it may stretch, tear, and reveal every imperfection beneath it. A thicker furniture film can be easier to position and may conceal minor surface variation more effectively.
Thickness alone does not establish quality. The adhesive, finish, print resolution, and ability to conform around edges also matter.
Compare samples in your actual kitchen
Colors shown online can appear different under warm bulbs, cool LEDs, or natural daylight. Order samples when possible and place them vertically on the cabinets for several days. Evaluate them in morning, afternoon, and evening light.
Examine the pattern repeat
Wood and stone patterns repeat across a roll. If the repeat is short or obvious, adjacent cabinet doors may look identical. Lay multiple sections side by side before installation. Rotate or shift the pattern when appropriate, while keeping wood grain aligned in a believable direction.
Choose a practical finish
Matte and softly textured surfaces tend to disguise fingerprints and small installation imperfections. Highly glossy film emphasizes bubbles, uneven doors, scratches, and reflected light. A busy pattern may help hide seams, while a plain solid color demands more precise application.
Check the roll dimensions
Two rolls with similar prices may contain very different amounts of material. Confirm both width and length. Select a roll wide enough to cover a cabinet door with minimal seams. A single continuous sheet usually looks better and is easier to clean than several narrow pieces.
How much contact paper do you need?
Measure each surface individually rather than estimating from the overall kitchen size. For every cabinet door and drawer front, record:
- Width
- Height
- Depth of edges being covered
- Direction of the pattern
- Additional material needed for wrapping
Add extra material around each piece so the film can be positioned and trimmed accurately. You will also need an allowance for:
- Pattern matching
- Cutting errors
- Damaged sections
- Future repairs
- Irregular doors and corners
Purchasing approximately 10% to 20% more than the measured requirement is a useful planning allowance for many projects. Complex doors or large repeating patterns may require more. Try to buy rolls from the same production batch. Small variations in color or texture can become visible across neighboring doors.
Tools and materials
Prepare everything before removing the first cabinet door. You may need:
- Contact paper or furniture film
- Tape measure
- Metal ruler or straightedge
- Pencil
- Sharp utility or craft knife
- Spare blades
- Scissors
- Felt-edged squeegee
- Soft microfiber cloths
- Appropriate degreasing cleaner
- Screwdriver or drill
- Cutting mat
- Low-tack painter’s tape
- Needle or fine pin for tiny trapped bubbles
- Hair dryer, if approved by the film manufacturer
- Labels for identifying doors and hardware
- Small bags for screws and hinges
A dull blade can drag and tear the film. Replace the blade whenever cuts stop feeling smooth.
How to apply contact paper to cabinets
Test the material
Apply a small sample to a concealed part of a door or cabinet. Leave it in place for the period recommended by the manufacturer or longer if possible then remove it carefully. Look for:
- Paint transfer
- Sticky residue
- Discoloration
- Finish separation
- Difficulty removing the film
Renters should obtain permission when required by their lease. A product described as removable can still damage a weak or poorly bonded finish.
Plan the order of work
Start with one small, less visible door. This gives you an opportunity to learn how the material behaves before covering the most noticeable cabinets.
Label every door and drawer so it returns to its original position. Hinges may have been adjusted individually, and exchanging similar-looking doors can create alignment problems.
Remove doors, handles, and hardware
Applying film to a door lying flat is generally easier than working vertically. Remove handles, knobs, and other hardware rather than cutting around them. Place the screws and fittings for each door in a labeled bag.
If removing the hinges is impractical, protect them carefully and work around them with precise cuts. This approach usually takes longer.
Clean the cabinets thoroughly
Kitchen cabinets collect invisible layers of cooking oil, hand oils, dust, polish, and cleaning products. Adhesive film cannot bond reliably over residue. Use a cleaner compatible with the cabinet finish and the film manufacturer’s instructions. Pay particular attention to:
- Areas around handles
- Lower corners
- Edges near the stove
- Doors below the sink
- Decorative grooves
- The top edge of upper doors
Rinse away cleaning residue when appropriate and allow the surface to dry completely.
Repair minor imperfections
Remove loose material and address damaged edges before covering them. Any filler, primer, or repair coating must be compatible with both the cabinet and the adhesive film. Self-adhesive-film manufacturer d-c-fix advises that application surfaces should be smooth and free from dust and grease.
It also recommends priming untreated porous materials such as raw chipboard or plywood before application. Review the full manufacturer application guidance for the particular type of film you use. Do not cover active water damage, mold, or swelling. Identify and resolve the source first.
Measure and cut each piece
Measure twice and cut the contact paper slightly larger than the face being covered. The surplus allows you to align the pattern and wrap or trim the edges cleanly. Use the grid on the backing paper as a guide, but verify it with a ruler. Printed grids are convenient; they should not replace actual measurements.
If using wood-grain film, decide whether the grain will run vertically or horizontally and keep the direction consistent across related cabinets.
Position the film
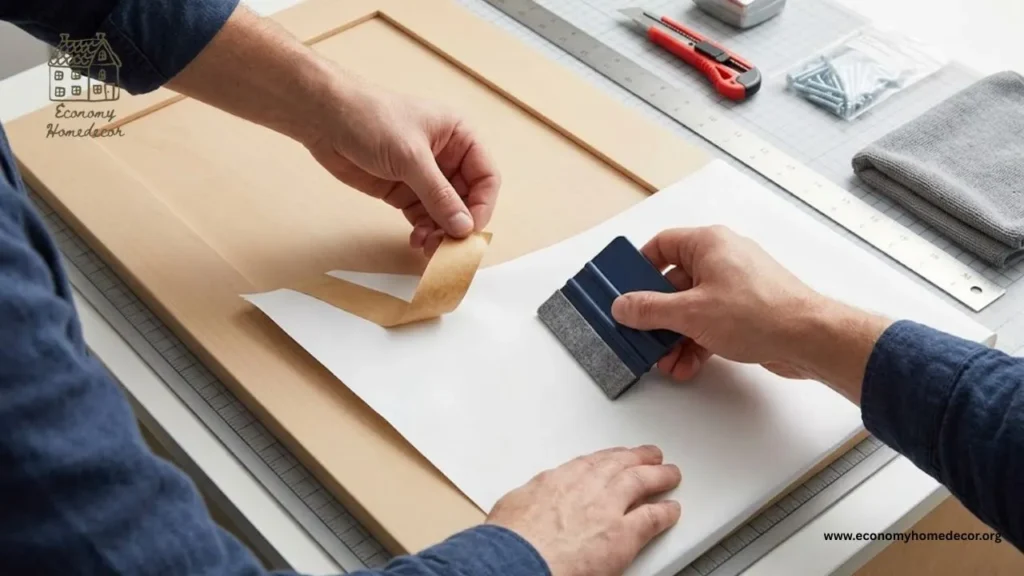
Peel away only a small section of backing paper. Align the exposed adhesive edge with the door, leaving enough material for trimming or wrapping. Do not remove the entire backing at once. A large exposed sheet can stick to itself, collect dust, or attach in the wrong position.
Apply gradually
Hold the unadhered film slightly away from the surface. Pull the backing away a little at a time while smoothing from the center toward the edges. Work in small sections. The d.c fix installation instructions similarly recommend removing the backing gradually.
It also pressing the film from the center outward with a smoothing tool or cloth. If the material starts to crease, stop. Gently lift the affected section if the product permits repositioning and apply it again. Repeated lifting can stretch the vinyl or weaken the adhesive, so avoid rushing.
Handle corners and edges
Corners are usually the most difficult part of the project. For square slab doors, wrap the material neatly around the edges if the product and door construction permit it. Make small relief cuts at the corners so the material can fold without forming a bulky cluster.
Some furniture films can be softened with gentle heat to conform around rounded edges. Use only the manufacturer’s recommended heat level. Too much heat can stretch, distort, discolor, or weaken the material.
A hair dryer on its lowest setting is recommended by d.c fix for working its film around rounded edges, with a warning not to overstretch it. This advice should not automatically be applied to products from other manufacturers.
Remove bubbles
Prevent bubbles by smoothing slowly from the center outward. For a large bubble near an edge, carefully lift the film and reapply it. For a tiny isolated bubble that cannot be moved, the manufacturer may permit puncturing it with a fine needle and smoothing out the trapped air.
Do not make unnecessary cuts in wet or frequently cleaned areas. Every puncture creates another possible route for moisture.
Trim the excess
Use a sharp blade and straightedge to cut away surplus material. Keep the blade controlled and angled away from visible surfaces. Avoid cutting deeply into the cabinet. Scratches beneath the film may become a problem when it is eventually removed.
Reinstall the hardware
Locate each screw hole carefully. A small controlled opening is better than cutting a large circle around the position. Reattach handles, hinges, and doors without overtightening.
Excessive pressure can twist the hardware or cause the film to bunch around the screw. Finally, align the doors and check that every edge opens without rubbing.
How to cover different cabinet-door styles
Flat slab doors
Flat doors are the easiest to cover and generally produce the smoothest results. Most can be covered with a single sheet.
Shaker-style cabinets
Shaker doors contain recessed centers and raised frames. Covering them with one sheet can cause bridging, wrinkles, or poor adhesion in the inner corners. Possible approaches include:
- Covering only the center panel
- Covering only the surrounding frame
- Applying separate pieces to different surfaces
- Choosing paint instead of contact paper
- Replacing the doors while retaining the cabinet boxes
Visible seams may be unavoidable. Test one complete door before buying material for the whole kitchen.
Raised-panel doors
Deep profiles and carved details make accurate wrapping difficult. The film must conform to several planes without lifting or stretching unevenly. A professional wrap may be possible, but ordinary DIY contact paper is rarely the easiest solution.
Cabinets with exposed edges
If the side edges remain visible when the doors are closed, decide whether they will also be covered. A dramatic color change on the front can look incomplete when the old finish remains visible around every door.
Best contact paper colors and designs for cabinets
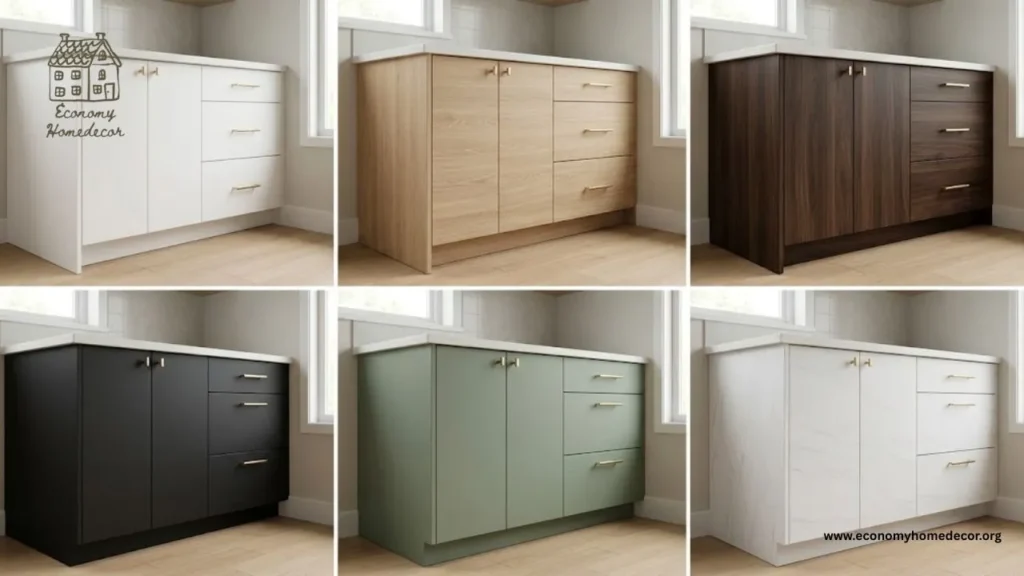
Matte white
White can brighten a dark kitchen and work with many countertop colors. It also reveals dirt, misaligned seams, and imperfect edges, so preparation must be careful.
Light wood grain
Oak, ash, and pale pine effects can introduce warmth without making a small kitchen feel heavy. Match the grain direction across neighboring doors.
Dark walnut
Dark wood can create a richer, more traditional appearance. It works best where there is sufficient natural or artificial light.
Black or charcoal
Dark contact paper can modernize lower cabinets or an island. Matte versions tend to be more forgiving than high-gloss black, which shows fingerprints and surface imperfections.
Marble effect
Marble contact paper is often more convincing on a countertop, shelf, or small accent panel than across an entire set of cabinet doors. Choose a large, irregular vein pattern rather than a short, obvious repeat.
Soft green, navy, or beige
Muted colors provide personality without relying on an artificial material effect. They can work well with simple hardware and restrained backsplashes.
Where contact paper should not be used
Avoid installing ordinary contact paper:
- Directly beside an open flame
- On surfaces that exceed the product’s heat rating
- Over a damaged electrical fitting
- Inside an oven or microwave
- Where standing water collects
- On damp or swollen cabinet material
- Over mold
- On food-preparation surfaces unless specifically approved for that use
- Where the manufacturer prohibits application
Some self-adhesive films have defined temperature limits. For example, d-c-fix states that its adhesive films can withstand temperatures up to 70°C, but specifications vary by brand and product. Always follow the instructions for the exact material purchased rather than applying one manufacturer’s limit to every contact paper.
How to use contact paper around sinks and stoves
Cabinets close to sinks and dishwashers experience more moisture. Those beside ovens and cooktops encounter more heat and grease. For sink cabinets:
- Repair all leaks first.
- Dry the substrate completely.
- Wrap or seal exposed edges only as directed.
- Wipe spills promptly.
- Inspect lower edges regularly.
For stove cabinets:
- Confirm the appliance’s required clearances.
- Review the film’s temperature rating.
- Do not cover ventilation openings.
- Keep the material away from flame and high-heat surfaces.
- Clean grease before it accumulates at the edges.
If a cabinet surface becomes noticeably hot during normal cooking, contact paper may not be an appropriate finish there.
How long does contact paper last on cabinets?
There is no single reliable lifespan. Performance depends on:
- Product quality
- Cabinet material
- Surface preparation
- Installation quality
- Kitchen heat and humidity
- Frequency of cleaning
- Direct sunlight
- Edge exposure
- Household use
A lightly used bathroom vanity may retain its finish longer than a kitchen cabinet beside a stove, sink, or dishwasher. Treat advertised durability as product-specific rather than universal. Keep leftover material labeled with its pattern and batch information. It can be used to replace a damaged panel later.
How to clean contact-paper cabinets
For routine cleaning:
- Use a soft, damp cloth.
- Add a small amount of mild dishwashing liquid when needed.
- Wipe without saturating seams or edges.
- Dry the surface with a clean cloth.
Avoid abrasive powders, scouring pads, steam cleaners, and strong solvents unless the manufacturer explicitly approves them. Test any new cleaner in a hidden area. Clean spills promptly, especially oil, tomato sauce, coffee, wine, and strongly colored spices.
How to repair peeling contact paper
A small lifted edge may be repairable if the surface beneath it is clean and undamaged. Try the following:
- Lift the loose section carefully.
- Remove dust or grease without stretching the film.
- Let the area dry completely.
- Press the film back into position.
- Apply gentle pressure along the edge.
Do not automatically add household glue. It may react with the vinyl, damage the cabinet finish, create lumps, or make later removal difficult. If the material has stretched, shrunk, torn, or collected dirt beneath the adhesive, replacing that section will usually look better than attempting to save it.
Frequent peeling may indicate poor surface preparation, excessive heat, moisture intrusion, or an unsuitable cabinet finish.
How to remove contact paper from cabinets
Start at a discreet corner and pull the film back slowly at a low angle. Do not yank it directly away from the cabinet. If the adhesive resists removal, the product manufacturer may recommend warming the surface gently with a hair dryer. Work in small sections and avoid overheating the door. After removal:
- Inspect the original finish.
- Use only a residue remover compatible with that finish.
- Test cleaners in a hidden area.
- Avoid metal scrapers.
- Do not soak particleboard, MDF, or wood edges.
According to d-c-fix, its film can be removed by lifting a corner and peeling it away, with gentle hair-dryer heat used to soften the adhesive where necessary. Removal behavior varies, so follow the instructions supplied with your chosen material.
Is contact paper safe for rental cabinets?
It can be, but “removable” is not the same as “guaranteed damage-free.” The main risks are:
- Pulling away old paint
- Damaging weak veneer
- Leaving adhesive residue
- Creating color differences beneath the covered area
- Violating lease conditions
- Trapping moisture against damaged material
Before covering rental cabinets:
- Read the lease.
- Ask the landlord or property manager when required.
- Document the cabinet condition with photographs.
- Test a small hidden area for several weeks.
- Keep the packaging and removal instructions.
- Avoid covering already damaged surfaces.
A removable liner placed only inside cabinets may be a safer option when modifying the doors is not permitted.
Contact paper versus painting cabinets
| Consideration | Contact paper | Cabinet paint |
|---|---|---|
| Initial cost | Usually lower | Varies with preparation and products |
| Installation | Peel, position, smooth and trim | Clean, sand, prime and apply several coats |
| Drying time | Minimal | Required between stages |
| Finish options | Printed patterns and solid colors | Primarily painted colors |
| Detailed doors | Difficult to wrap | Often easier to coat |
| Repairability | Damaged sections may be replaced | Chips may be touched up |
| Removability | Sometimes removable | Generally considered permanent |
| Heat and edge performance | Product-dependent | Product and preparation-dependent |
| Best use | Temporary or budget makeover | Longer-term refinishing |
Neither method will succeed over grease, moisture damage, or a failing original finish.
Common mistakes to avoid
Skipping the test patch
Testing is particularly important on painted, veneered, old, or rental cabinets.
Ordering the exact measured amount
Errors, pattern alignment, and future repairs require extra material.
Removing all the backing at once
This makes large pieces difficult to control and increases the likelihood of wrinkles.
Stretching the material
Stretched vinyl may retract later, exposing edges or opening seams.
Covering damaged cabinets
Contact paper may temporarily conceal damage, but it will not stop swelling, decay, or delamination.
Using too much heat
Gentle heat can help certain films conform. Excessive heat can permanently distort them.
Ignoring pattern direction
Wood grain that changes direction from one door to the next makes the project look inconsistent.
Cutting around handles instead of removing them
Removing hardware generally creates a cleaner finish and more accurate openings.
Rushing the edges
Edges are where moisture, grease, and repeated handling are most likely to cause failure. Take more time there than on the center of the door.
Covering the entire kitchen before evaluating one door
Complete one door, reinstall it, and inspect it under normal lighting. This small trial can prevent an expensive whole-kitchen mistake.
Is contact paper for cabinets worth it?
Contact paper is worth considering when you want an inexpensive cosmetic change, have smooth cabinets in sound condition, and are comfortable accepting a temporary finish. It is particularly useful for:
- Rental-friendly decorating, with permission
- Short-term kitchen updates
- Laundry-room cabinets
- Bathroom vanities away from persistent water
- Inside shelves and drawers
- Small accent cabinets
- Budget makeovers before a future renovation
It may not be the best choice for badly damaged cabinets, heavily detailed doors, high-heat areas, or kitchens expected to withstand years of intensive use.
The most successful makeover begins with realistic expectations. Contact paper can change color and style, but it cannot make damaged cabinet construction new again.
Final cabinet makeover checklist
Before starting, confirm that:
- The cabinet surface is smooth and secure.
- There is no active leak or moisture damage.
- The film is intended for furniture or cabinetry.
- You have checked its heat and cleaning limitations.
- A test patch can be removed safely.
- The rolls have enough width for the doors.
- Pattern direction has been planned.
- You purchased extra material.
- Doors and hardware can be labeled.
- The surface has been cleaned and dried.
- Sharp cutting tools and a proper squeegee are available.
- You have completed one trial door successfully.
Using contact paper for cabinets can be one of the quickest ways to refresh a dated kitchen without committing to replacement or permanent refinishing. Careful product selection, thorough degreasing, gradual application, and neatly finished edges are what separate a convincing makeover from an obviously temporary covering.
Frequently Asked Questions
Can contact paper be used on all cabinets?
No. It adheres best to smooth, clean, sealed, and undamaged surfaces. Raw wood, peeling paint, textured doors, damaged veneer, and swollen particleboard may not produce reliable results.
Does contact paper damage cabinet paint?
It can damage paint that is old, weak, improperly prepared, or poorly bonded to the cabinet. Heat and long-term adhesion may also affect removal. Always perform a hidden test before covering the complete door.
Can you put contact paper on laminate cabinets?
Many self-adhesive furniture films can be applied to smooth laminate. The surface must be thoroughly degreased, rinsed when appropriate, and dried. Confirm compatibility with the film manufacturer.
Can contact paper be applied over wood cabinets?
It may work on sealed, smooth wood. Untreated or porous wood may need appropriate preparation or primer. Applying adhesive film to valuable natural-wood cabinetry may not be advisable because the finish could be affected.
Can contact paper withstand kitchen heat?
Heat resistance varies by product. Keep ordinary contact paper away from flames and surfaces that become hotter than its specified limit. Do not cover appliance vents or ignore required clearances.
Is contact paper waterproof?
Some products are water-resistant, but edges, seams, and punctures remain vulnerable. Wipe spills promptly and do not use contact paper to conceal a leak or persistent dampness.
Can contact paper cover cabinet grooves?
Shallow grooves may be covered with careful cutting or specialized film, but complex Shaker and raised-panel doors are much more difficult than flat doors. Complete one test door before continuing.
Can contact paper be removed easily?
Removal depends on the film, adhesive, installation period, cabinet finish, and exposure to heat. Gentle warming may help, but a test patch is the only reliable way to assess a specific cabinet-and-film combination.
Should contact paper wrap around cabinet-door edges?
Wrapping can produce a more complete appearance and may reduce visible seams, but only when the film can conform properly and the door has suitable edges. Follow the product instructions and avoid bulky overlapping corners.