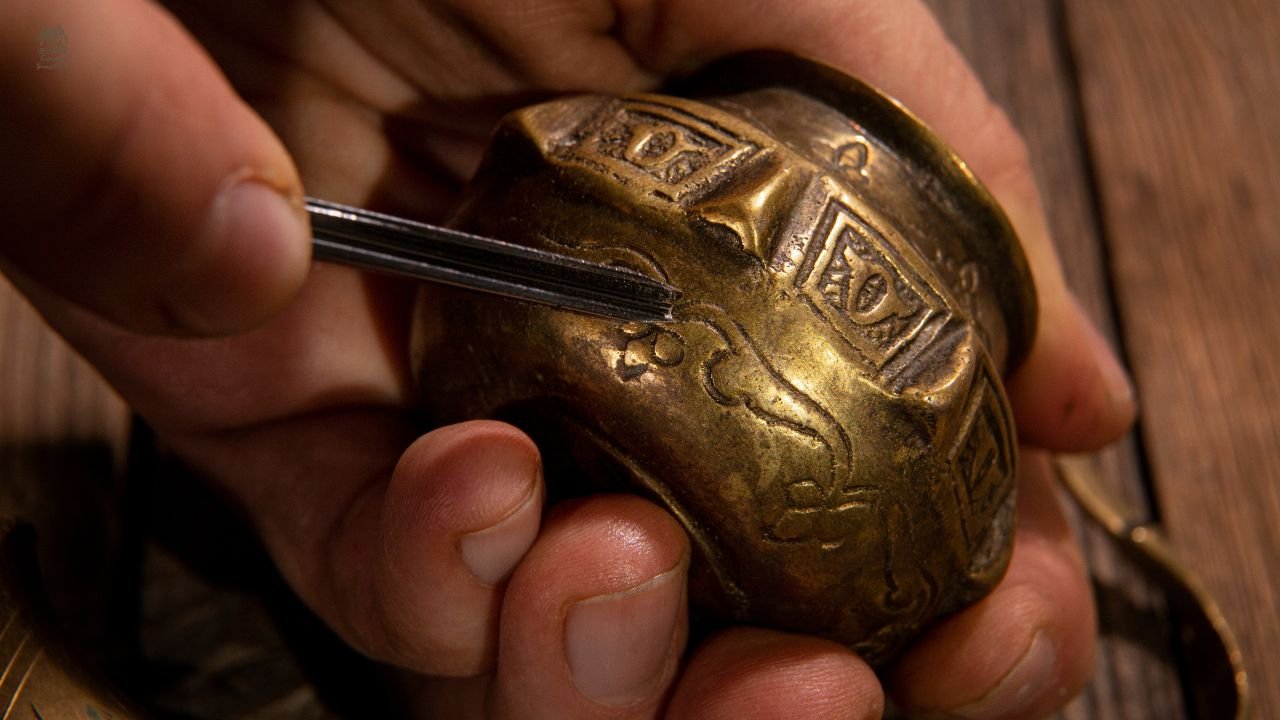
Bright, polished brass has its place, but sometimes it feels a little too new for the warm, lived-in style you’re trying to create. Whether you’re updating cabinet pulls, restoring vintage décor, or adding character to a DIY project, learning how to age brass can completely transform the look of ordinary hardware. An aged finish adds depth, texture, and timeless charm that shiny brass simply can’t match.
The good news is that creating an authentic patina isn’t difficult. With a few common household ingredients and a little patience, you can achieve beautiful results without spending a fortune. Whether you want a subtle vintage appearance or a dramatically weathered finish, there are several proven techniques that work on everything from decorative pieces to cabinet hardware.
Throughout this guide, you’ll discover exactly how to antique brass, how to tarnish brass, and even how to tarnish brass quickly when you’re short on time. We’ll also explain why brass changes color naturally, which methods produce the most realistic results, and how to control the final appearance so your project looks professionally finished.
What Is Aged Brass?
Before you begin aging brass, it’s helpful to understand what makes antique brass look so attractive.
Freshly polished brass has a bright golden color with a reflective surface. Over time, exposure to oxygen, humidity, skin oils, and environmental pollutants slowly changes its appearance. This natural chemical reaction forms a patina, causing the surface to darken and develop rich shades of brown, bronze, amber, and even subtle green tones.
This transformation explains how does brass age over months or years. Many homeowners love this naturally aged appearance because it gives furniture and fixtures more personality than perfectly polished metal.
If you’ve ever wondered what is aged brass, think of it as brass that has developed a soft, muted finish instead of a mirror-like shine. Depending on the technique used, the result may range from lightly worn to deeply antiqued.
Many people also ask what does aged brass look like compared to polished brass. An aged brass finish typically has:
- Warm bronze and honey-colored tones
- Darkened edges and recessed details
- Reduced shine
- Soft matte appearance
- Natural-looking variations in color
- A handcrafted vintage character
These subtle imperfections are exactly what make weathered brass so desirable in farmhouse, industrial, traditional, and modern interiors alike.
Why People Choose to Age Brass
There are several reasons DIY enthusiasts intentionally age brass instead of keeping it polished.
One of the biggest reasons is aesthetics. Bright metal can sometimes appear too modern, while antiquing brass creates warmth and visual depth. Interior designers frequently pair aged brass with natural wood, marble, stone, black cabinetry, and painted furniture because the finish feels timeless rather than trendy.
Another advantage is that aged finishes hide fingerprints, scratches, and minor wear much better than highly polished surfaces. This makes them especially popular for kitchens and bathrooms where cabinet pulls and faucets are handled every day.
Homeowners also choose how to age brass hardware when replacing only part of an existing set. New hardware often looks noticeably brighter than older fixtures. Artificially aging new pieces helps everything blend together seamlessly.
Many DIY restorers also use how to make brass look old, how to make brass look antique, and how to darken brass techniques when restoring vintage furniture. Instead of replacing original hardware, they refresh the finish while preserving the item’s historical charm.
Does Every Brass Item Age the Same Way?
Not exactly.
Before attempting how to oxidize brass or how to dull brass, you need to determine what type of brass you’re working with.
Solid brass reacts much more easily because the surface is genuine brass throughout. Brass-plated items have only a thin outer coating, so aggressive treatments can damage the finish if you’re not careful.
You’ll generally encounter:
- Solid brass
- Brass-plated steel
- Brass-plated zinc
- Lacquered brass
- Unlacquered brass
This distinction is important because how to age unlacquered brass differs significantly from how to age lacquered brass.
Unlacquered brass naturally develops patina over time, making it much easier to alter its appearance. Lacquered brass has a clear protective coating that prevents oxidation, so you’ll need to remove that coating before most aging methods will work effectively.
Likewise, how to age polished brass usually requires lightly removing any protective finish first, while already worn pieces often respond immediately to aging solutions.
Understanding your material will help you decide whether you need brass aging solution, homemade recipes like aging brass with vinegar, or more advanced commercial products such as brass ager or brass ager Home Depot products.
Tools and Supplies You’ll Need
Fortunately, most DIY methods require inexpensive materials you may already have at home.
Basic supplies include:
- White vinegar
- Table salt
- Lemon juice
- Baking soda
- Small plastic container
- Spray bottle
- Fine steel wool
- Soft cloths
- Disposable gloves
- Protective eyewear
- Warm water
- Mild dish soap
Depending on the technique, you may also use specialty products like a brass aging solution designed specifically for metal finishes.
Some experienced restorers also experiment with aging brass with oven cleaner, although this method requires extra caution because oven cleaners contain strong chemicals that can damage surrounding materials if used improperly.
Before starting any project, always clean the brass thoroughly. Dirt, grease, fingerprints, and wax prevent chemicals from reacting evenly, resulting in blotchy coloration.
A clean surface ensures more consistent darkening brass, smoother oxidation, and a more realistic antique appearance.
Preparing Brass Before Aging
Preparation is often the difference between an amateur-looking finish and one that appears naturally aged over decades.
First, wash the brass with warm water and dish soap to remove dirt and oils. Dry it completely with a lint-free cloth.
If you’re working on lacquered hardware, remove the clear protective coating according to the manufacturer’s recommendations. This is especially important for anyone learning how to age shiny brass, how to antique brass hardware, or how to age brass plated hardware, since coatings prevent oxidation from reaching the metal itself.
Lightly rubbing the surface with very fine steel wool also helps. This slightly roughens the finish, allowing vinegar-based solutions to cling more evenly.
Some DIY enthusiasts wanting how to make shiny brass matte intentionally create a soft brushed appearance before beginning the patina process. This subtle texture often produces a more convincing antique finish than leaving the surface perfectly polished.
How to Age Brass with Vinegar and Salt
One of the most popular ways to learn how to age brass is by using white vinegar and salt. These inexpensive household ingredients encourage oxidation, helping the metal develop a beautiful antique appearance much faster than it would naturally.
This method is especially useful if you’re looking for aging brass with vinegar, how to age brass with vinegar and salt, or patina brass with vinegar without purchasing specialty chemicals.
You’ll need:
- White vinegar
- Table salt
- Spray bottle or bowl
- Soft cloth
- Gloves
- Clean brass item
Begin by cleaning the brass thoroughly. Mix equal parts vinegar and water, then dissolve one tablespoon of salt into the solution. Spray or wipe the mixture evenly over the brass surface.
Instead of rinsing immediately, allow the solution to remain on the metal. As moisture evaporates, oxidation begins forming. Repeat the application several times until the color reaches your desired depth.
The longer the brass remains exposed, the darker the finish becomes. This gradual process gives you excellent control over the final appearance.
Many DIY enthusiasts prefer this technique because it creates realistic variations rather than an overly uniform finish. Those natural inconsistencies are what make antique brass look authentic.
How to Tarnish Brass Quickly
Sometimes you don’t want to wait days for natural oxidation. If your goal is how to tarnish brass quickly, several faster methods can help speed up the process.
The quickest techniques include:
- Vinegar and salt solution
- Ammonia vapor (handled carefully)
- Commercial brass aging solution
- Liver of sulfur products
- Heat-assisted oxidation
If you’re wondering how to quickly tarnish brass or tarnish brass quickly, commercial patina products usually provide the fastest and most predictable results.
However, homemade solutions often create a softer, more natural-looking finish.
To encourage faster oxidation naturally:
- Keep the brass slightly damp.
- Increase humidity around the item.
- Reapply the vinegar solution several times.
- Allow air circulation between coats.
- Avoid wiping away the developing patina.
These simple adjustments dramatically improve results when learning how to age brass quickly without damaging the metal.
How to Oxidize Brass Naturally
Many homeowners prefer a slower, chemical-free approach.
Learning how to oxidize brass naturally produces subtle color transitions that closely resemble decades of aging.
Natural oxidation occurs because oxygen reacts with copper and zinc inside the brass alloy. Moisture, oils from your hands, and changes in humidity gradually deepen the color.
If patience isn’t a problem, simply leave unlacquered brass exposed to normal household conditions.
Over time you’ll notice:
- Golden brass becoming honey-colored.
- Honey tones turning bronze.
- Bronze slowly darkening.
- Recessed details becoming deeper than raised surfaces.
This process explains brass age and why antique fixtures develop such unique character over many years.
People often ask, “Can I oxidize brass without chemicals?”
Yes. Although the process is much slower, simply allowing natural exposure will eventually produce a beautiful patina.
How to Darken Brass Without Ruining the Finish
One of the biggest concerns beginners have is permanently damaging their hardware.
Fortunately, learning how to darken brass safely is fairly straightforward.
Start slowly.
Rather than trying to create a dark antique finish in one treatment, apply several light applications instead.
This gives you greater control over darkening brass while reducing the risk of uneven blotches.
For decorative hardware, cabinet pulls, and furniture accents, gradual color changes usually appear much more convincing than dramatic black finishes.
When trying how to darken brass hardware, pay extra attention to edges and decorative grooves. Allow slightly more solution to collect there because natural aging almost always darkens recessed areas first.
If the finish becomes darker than expected, gently polish high spots using a soft cloth. This creates highlights that mimic years of natural wear.
This technique is commonly used during antiquing brass to produce professional-looking results.
How to Make Brass Look Old
If your goal isn’t just darker brass—but truly vintage-looking brass—you’ll want to combine several techniques.
Many DIY restorers searching for how to make brass look old, make brass look old, or how to make brass look antique focus on adding variation instead of simply changing color.
An authentic antique finish usually includes:
- Dark crevices
- Slightly lighter edges
- Reduced shine
- Small color variations
- Soft matte texture
- Gentle wear on raised surfaces
Rather than making every inch identical, antique brass develops character over time.
After applying your aging solution, lightly buff corners with a cloth.
This recreates decades of natural handling.
If you’re restoring vintage furniture, this extra step makes an enormous difference in realism.
Some people also experiment with how to distress brass, gently creating tiny imperfections before applying the patina.
When done carefully, distressing enhances the illusion of age without making the hardware appear damaged.
How to Dull Brass and Reduce Shine
Freshly polished brass reflects a lot of light.
Vintage brass rarely does.
That’s why many DIY enthusiasts also search for how to dull brass, dull brass, and how to dull shiny brass.
Reducing gloss makes the finish look considerably older.
Methods include:
- Fine steel wool
- Scotch-Brite pads
- Matte clear wax
- Aging solutions
- Light buffing
Avoid coarse abrasives that leave obvious scratches.
Instead, create a soft satin appearance.
If your hardware is extremely reflective, you may also want to learn how to make shiny brass matte before applying your aging treatment.
The combination of reduced shine and subtle oxidation creates a far more authentic antique appearance than color change alone.
Aging Lacquered and Polished Brass
Many homeowners discover their hardware doesn’t react at all to vinegar.
The reason is simple.
The clear lacquer acts like a protective barrier.
That’s why how to age lacquered brass requires one additional preparation step.
Before applying any patina treatment:
- Remove the lacquer carefully.
- Clean the surface thoroughly.
- Dry completely.
- Begin the oxidation process.
Likewise, how to age polished brass often starts by removing any protective wax or coating that prevents oxidation.
Once exposed, the brass behaves much like unlacquered metal.
If you’re working with cabinet knobs or decorative fixtures, always test one hidden area first before treating the entire piece.
Image Placement: Side-by-side photo showing polished brass, lacquered brass, and aged brass after treatment.
Aging Brass Hardware
Cabinet pulls, door handles, hinges, and light fixtures are among the most common DIY projects.
Learning how to age brass hardware, how to antique brass hardware, how to age brass plated hardware, and how to darken brass hardware allows you to coordinate new fixtures with older décor.
Because hardware receives frequent handling, durability matters.
After achieving your desired finish:
- Let the patina cure completely.
- Avoid excessive polishing.
- Seal only if necessary.
- Clean gently using mild soap.
Over time, natural wear will continue enhancing the appearance.
This gradual evolution is one reason homeowners love brass aging techniques.
Instead of looking worn out, aged brass often becomes more attractive with continued use.
Commercial Brass Aging Products
Household ingredients work well, but they’re not your only option.
Professional restorers frequently use products specifically designed for aging brass.
Popular options include:
- Brass ager
- Commercial brass aging solution
- Metal patina concentrates
- Oxidizing gels
Some DIYers look for brass ager Home Depot products or similar metal finishing solutions available through hardware stores.
Commercial formulas generally provide:
- Faster results
- More consistent color
- Better repeatability
- Greater control
They’re especially useful when aging multiple pieces that need matching finishes.
Whether you choose homemade recipes or professional products, both methods can produce beautiful antique hardware when used carefully.
Frequently Asked Questions
How do you age brass naturally?
If you’re wondering how do you age brass, the easiest natural method is simply allowing unlacquered brass to react with air, moisture, and everyday handling over time. This slow oxidation creates a soft patina that many homeowners love. If you want to speed things up slightly, aging brass with vinegar or patina brass with vinegar is a popular DIY approach that still produces a natural-looking finish.
How do you tarnish brass without damaging it?
Many people ask how do you tarnish brass safely. Start with a clean surface and use a gentle solution of white vinegar and salt. This encourages oxidation without harming solid brass. Avoid harsh abrasives or strong chemicals unless you’re familiar with their effects. Gradual tarnishing brass almost always produces a more authentic result than forcing an extremely dark finish all at once.
Can I age shiny brass hardware?
Yes. Learning how to age shiny brass starts with determining whether the piece has a protective lacquer. If it does, remove the coating first. Once the brass is exposed, you can use vinegar, salt, or a brass aging solution to create an attractive antique finish. This same process works well when learning how to age brass hardware or how to antique brass hardware.
What does aged brass look like?
If you’ve never seen an antique finish in person, you may wonder what does aged brass look like. Instead of bright gold, aged brass has warm bronze, brown, amber, and honey-colored tones with darker recesses and softer highlights. The finish is usually less reflective than shiny brass, giving it a timeless appearance that complements both traditional and modern interiors.
Can brass-plated items be aged?
Yes, but extra care is required when learning how to age brass plated hardware. Because only the outer layer is brass, aggressive sanding or harsh chemicals can expose the metal underneath. Always test an inconspicuous area first and use gentle oxidation methods whenever possible.
How can I make brass look antique?
There are several ways to achieve an authentic vintage appearance. Homeowners searching for how to make brass look antique, how to make antique brass finish, or how do you antique brass often combine light oxidation with gentle polishing on raised areas. This creates realistic contrast and resembles decades of natural wear.
What’s the difference between tarnish and patina?
Although they’re often used interchangeably, tarnish is the initial discoloration caused by oxidation, while patina is the fully developed surface that forms over time. When you how to patina brass, you’re encouraging that complete aged appearance rather than simple discoloration. A beautiful antique brass patina adds depth and character that continues to improve with age.
Can I change the color of brass?
Absolutely. If you’re wondering how to change the color of brass, several methods are available. Vinegar and salt create warm brown tones, while commercial patina products offer greater control over color depth. Depending on the technique, you can how to color brass, stain brass, how to stain brass, or create anything from light bronze to deep antique finishes.
What if my brass won’t change color?
If your brass isn’t reacting, it’s probably coated with lacquer. In that case, you’ll need to learn how to age lacquered brass before any oxidation method will work. Once the protective coating is removed, the brass should respond much more easily to homemade or commercial aging solutions.
Common Mistakes to Avoid When Aging Brass
Even simple DIY projects can go wrong without proper preparation. Avoiding these common mistakes will help you achieve a professional-looking finish the first time.
Skipping the Cleaning Step
Oil, wax, fingerprints, and dust prevent oxidation from developing evenly. Always clean brass thoroughly before attempting age brass techniques.
Applying Too Much Solution at Once
Heavy applications often create blotchy patches. Multiple light treatments produce a much more natural aged brass finish.
Using Harsh Abrasives
Coarse sandpaper or aggressive wire brushes leave permanent scratches. If you need to reduce shine, choose fine steel wool instead when learning how to burnish brass or soften the surface before aging.
Ignoring the Type of Brass
Solid brass, plated brass, lacquered brass, and unlacquered brass all react differently. Understanding your material makes techniques like how to age unlacquered brass and how to age polished brass much easier.
Expecting Every Piece to Match Perfectly
One of the best qualities of antique brass is that no two pieces look identical. Slight differences in color make weathered brass appear authentic rather than factory-made.
Caring for Aged Brass
After creating your ideal finish, proper maintenance will help preserve its character.
For everyday cleaning:
- Dust regularly with a soft microfiber cloth.
- Wash occasionally using mild soap and warm water.
- Dry immediately after cleaning.
- Avoid abrasive polishes that remove the patina.
- Handle decorative pieces gently whenever possible.
Some homeowners prefer allowing the patina to continue developing naturally. Others apply a clear protective wax once they achieve the desired appearance. Both approaches are effective—the choice depends on whether you want the finish to continue evolving over time.
It’s also worth remembering that ageing brass is an ongoing process. Even after you’ve completed your DIY treatment, exposure to air and everyday use will continue adding depth and richness to the metal.
For readers searching internationally, you may even come across guides titled วิธี ทำ เนื้อ ทองเหลือง ให้เก่า, which refers to methods for making brass look old. Regardless of the language, the principles remain the same: clean the surface, encourage oxidation, and allow a beautiful patina to develop naturally.
Conclusion
Learning how to age brass is one of the easiest ways to give ordinary hardware, fixtures, and decorative pieces a timeless, custom appearance. Whether you choose aging brass with vinegar, a professional brass ager, or a ready-made brass aging solution, the goal is always the same—creating depth, warmth, and character that polished metal simply can’t replicate.
From understanding how does brass age naturally to mastering techniques like how to tarnish brass, how to oxidize brass, how to darken brass, and how to weather brass, you now have the knowledge to achieve a finish that suits your style. You can create a lightly aged look with subtle warmth or a rich antique brass patina filled with years of visual character.
The key is patience. Work in thin layers, observe how the metal reacts, and adjust the process gradually. Whether you’re restoring vintage furniture, updating cabinet hardware, or transforming decorative accents, a carefully aged finish brings authenticity that never goes out of style.
With the right preparation and a little experimentation, you’ll be able to confidently answer how do you age brass, create beautiful brass aging results, and enjoy the unique beauty that only naturally inspired patina can provide.